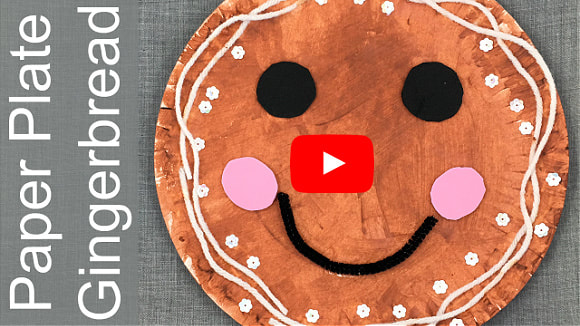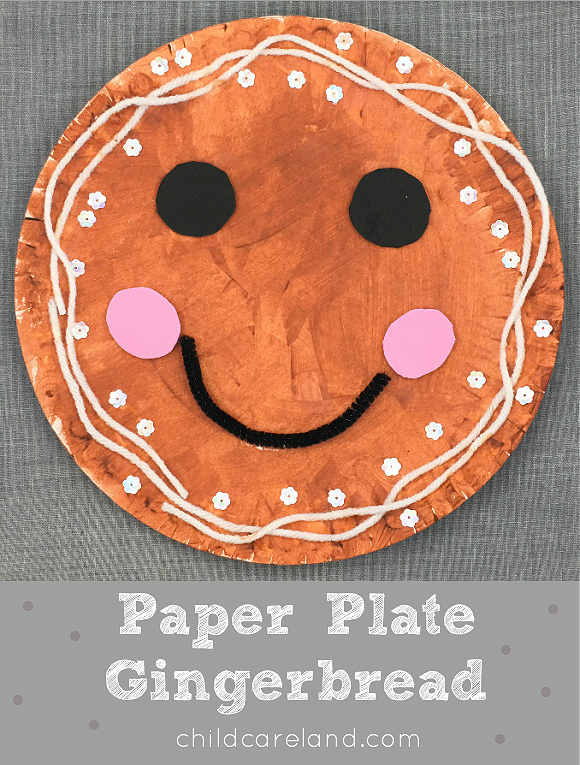
We made paper plate gingerbread and they really turned out super cute. Not only did the children enjoy making this project but they also got lots of fine motor practice.
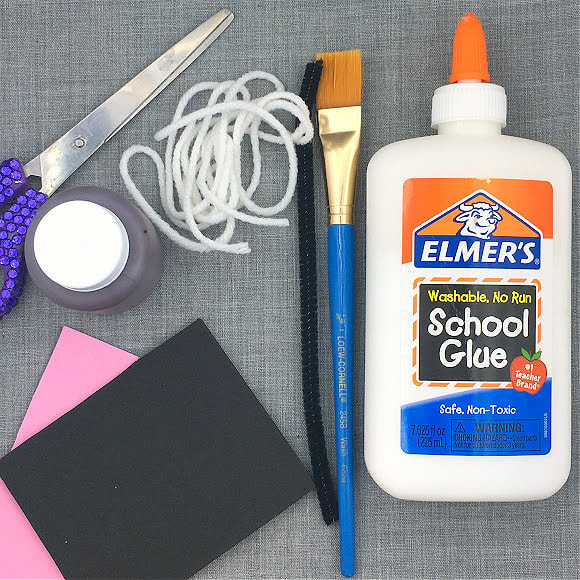
You will need to have:
paper plates (we glued two together)
white yarn
black yarn or pipe cleaner
brown paint
paint brush
scissors
black and pink craft foam or construction paper
white sequins (optional)
paper plates (we glued two together)
white yarn
black yarn or pipe cleaner
brown paint
paint brush
scissors
black and pink craft foam or construction paper
white sequins (optional)
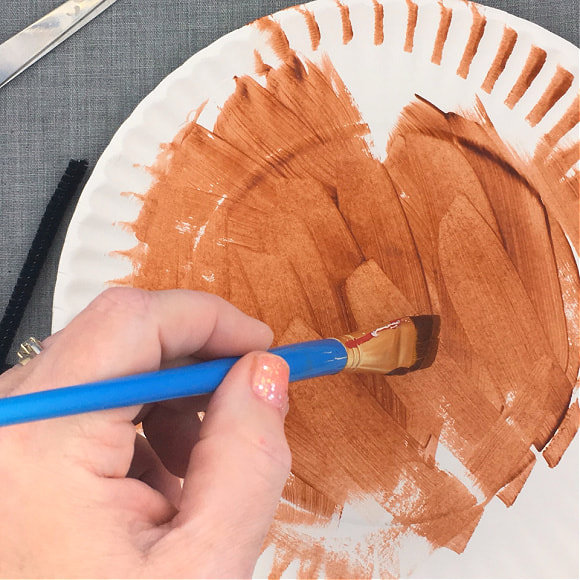
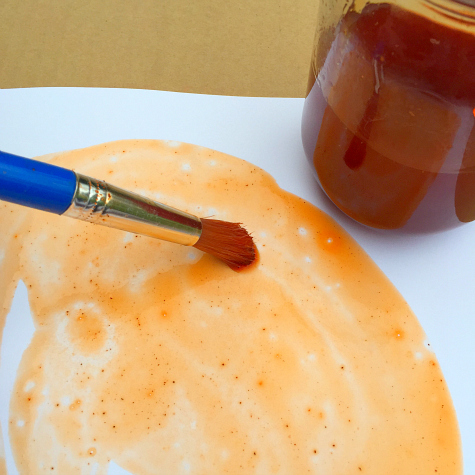
The first step is to paint the paper plate brown and let it dry. While the paper plate is drying we cut out two circles from the black craft foam and two from the pink. You can also use construction or cardstock paper if you do not have craft foam.
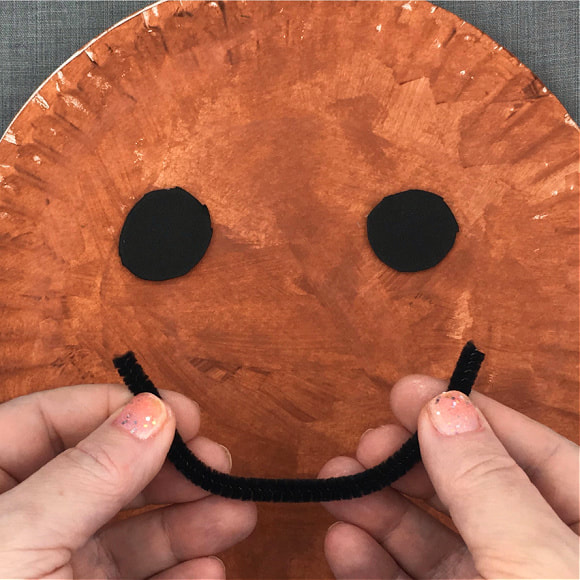
We glue the black circles on for the gingerbread eyes and formed a smile shape with a black pipe cleaner and also glued that on (you can substitue black yarn if you do not have pipe cleaners). We then glue a pink circle on each side of the mouth to from the gingerbread cheeks.
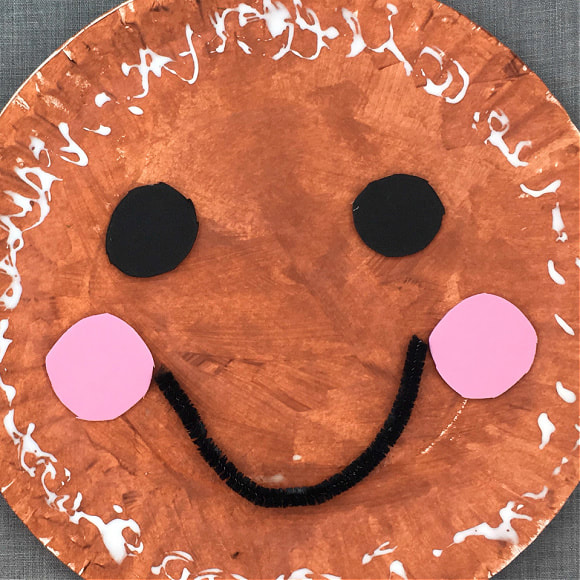
The next step was to apply glue around the edge of the paper plate and press the yarn on to make the gingerbread icing.
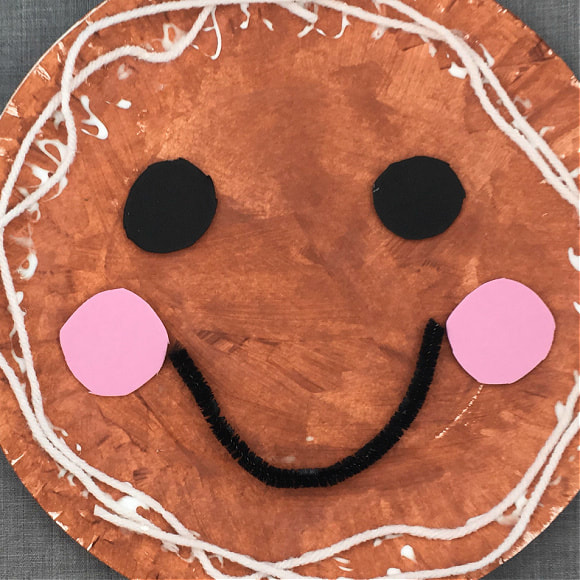
We went around the the paper plate twice with the white yarn. To add an optional sparkle we then pressed white iridescent sequins on the glue as well adding more glue dots if we need them.
You can see a video of this project by clicking below:
You can see a video of this project by clicking below: